

When you check an HVAC unit or an industrial motor, you may find fluid around the internal parts. This serves as a clear warning sign. The most visible clue is a sticky film or a puddle of dielectric fluid near the base of the cylinder. Also the top of the aluminum shell may look swollen or bulging. This shows that internal pressure has damaged the seal. The component has failed.
Before there is any evidence of a leakage, the machinery usually exhibits signs of malfunction. One such sign includes a situation whereby the AC compressor or the motor emits a humming noise without starting up. Frequent tripping of circuit breakers or the sudden loss of an air conditioning system’s cooling performance is another key sign. This occurs due to inadequate starting torque.

Dielectric fluid serves two important purposes. It provides electrical insulation and heat dissipation. Once this fluid escapes, the microfarad (µF) rating drops quickly. This forces the motor to draw very high currents while trying to start. The result is poor overall performance, serious overheating, and eventual system stalling.
Like all electrical components, insulating materials and physical seals degrade over time. Years of continuous thermal cycling cause the seams and terminal O-rings to lose their elasticity. The parts expand during operation and contract while off. This natural wear is the most common reason why a CBB65 Capacitor leaking fluid becomes a frustrating reality for maintenance teams.
Heat is the main enemy of electrical storage devices. Severe voltage fluctuations can cause problems. Running equipment in poorly ventilated or high-temperature environments can break down the internal dielectric layers. This electrical stress generates extra gas. The gas creates intense internal pressure that pushes the insulating oil out of the weakest points of the casing.
Not all components are built to the same standards. Substandard sealing materials and manual potting processes often lead to early fluid leaks. To combat this, industry leaders like SMILER capacitor utilize mature and highly automated production lines. These ensure precise assembly and an impressive finished product qualification rate of over 99.93%. Choosing well-manufactured components greatly reduces the likelihood of early failure.
Ignoring a fluid leak is not merely a performance issue. It is a serious safety hazard. The escaping dielectric oil can be flammable. If exposed to internal sparks or extreme operating temperatures, it creates a severe fire risk. Furthermore, if the internal pressure cannot vent properly, the metal casing might rupture with force.
When fluid loss reduces capacitance, the motor loses its vital phase-shifting support. It attempts to run on a single phase. This action drastically lowers its mechanical efficiency. The stator windings absorb the excess strain and heat up rapidly. These conditions severely shorten the lifespan of expensive compressors and water pumps.
What starts as a minor and inexpensive component failure can quickly grow. If left unaddressed, the persistent overheating and electrical imbalances will eventually lead to melted control boards. They can cause short circuits or a completely seized motor. This situation turns a cheap fix into a massive replacement bill.
Before opening any access panels, completely disconnect the main power. Use a flashlight to inspect the base and the crimped edges of the metal cylinder for oily residue. Any dome-like bulging at the terminal end indicates that the internal pressure relief mechanism has deployed. This means the part is permanently damaged.
Visual checks are helpful. Electrical testing provides definitive proof. Using a multimeter with a capacitance setting, measure the microfarads. If the reading falls outside the acceptable tolerance range, the internal integrity is compromised. This holds true even if the external fluid leak seems minor.
Handling high-voltage electrical components carries a risk of lethal shock. These devices store energy even after the power is cut. If the discharging process is unfamiliar or if the system wiring appears overly complex, it is always safest to hire a licensed HVAC technician or electrician.
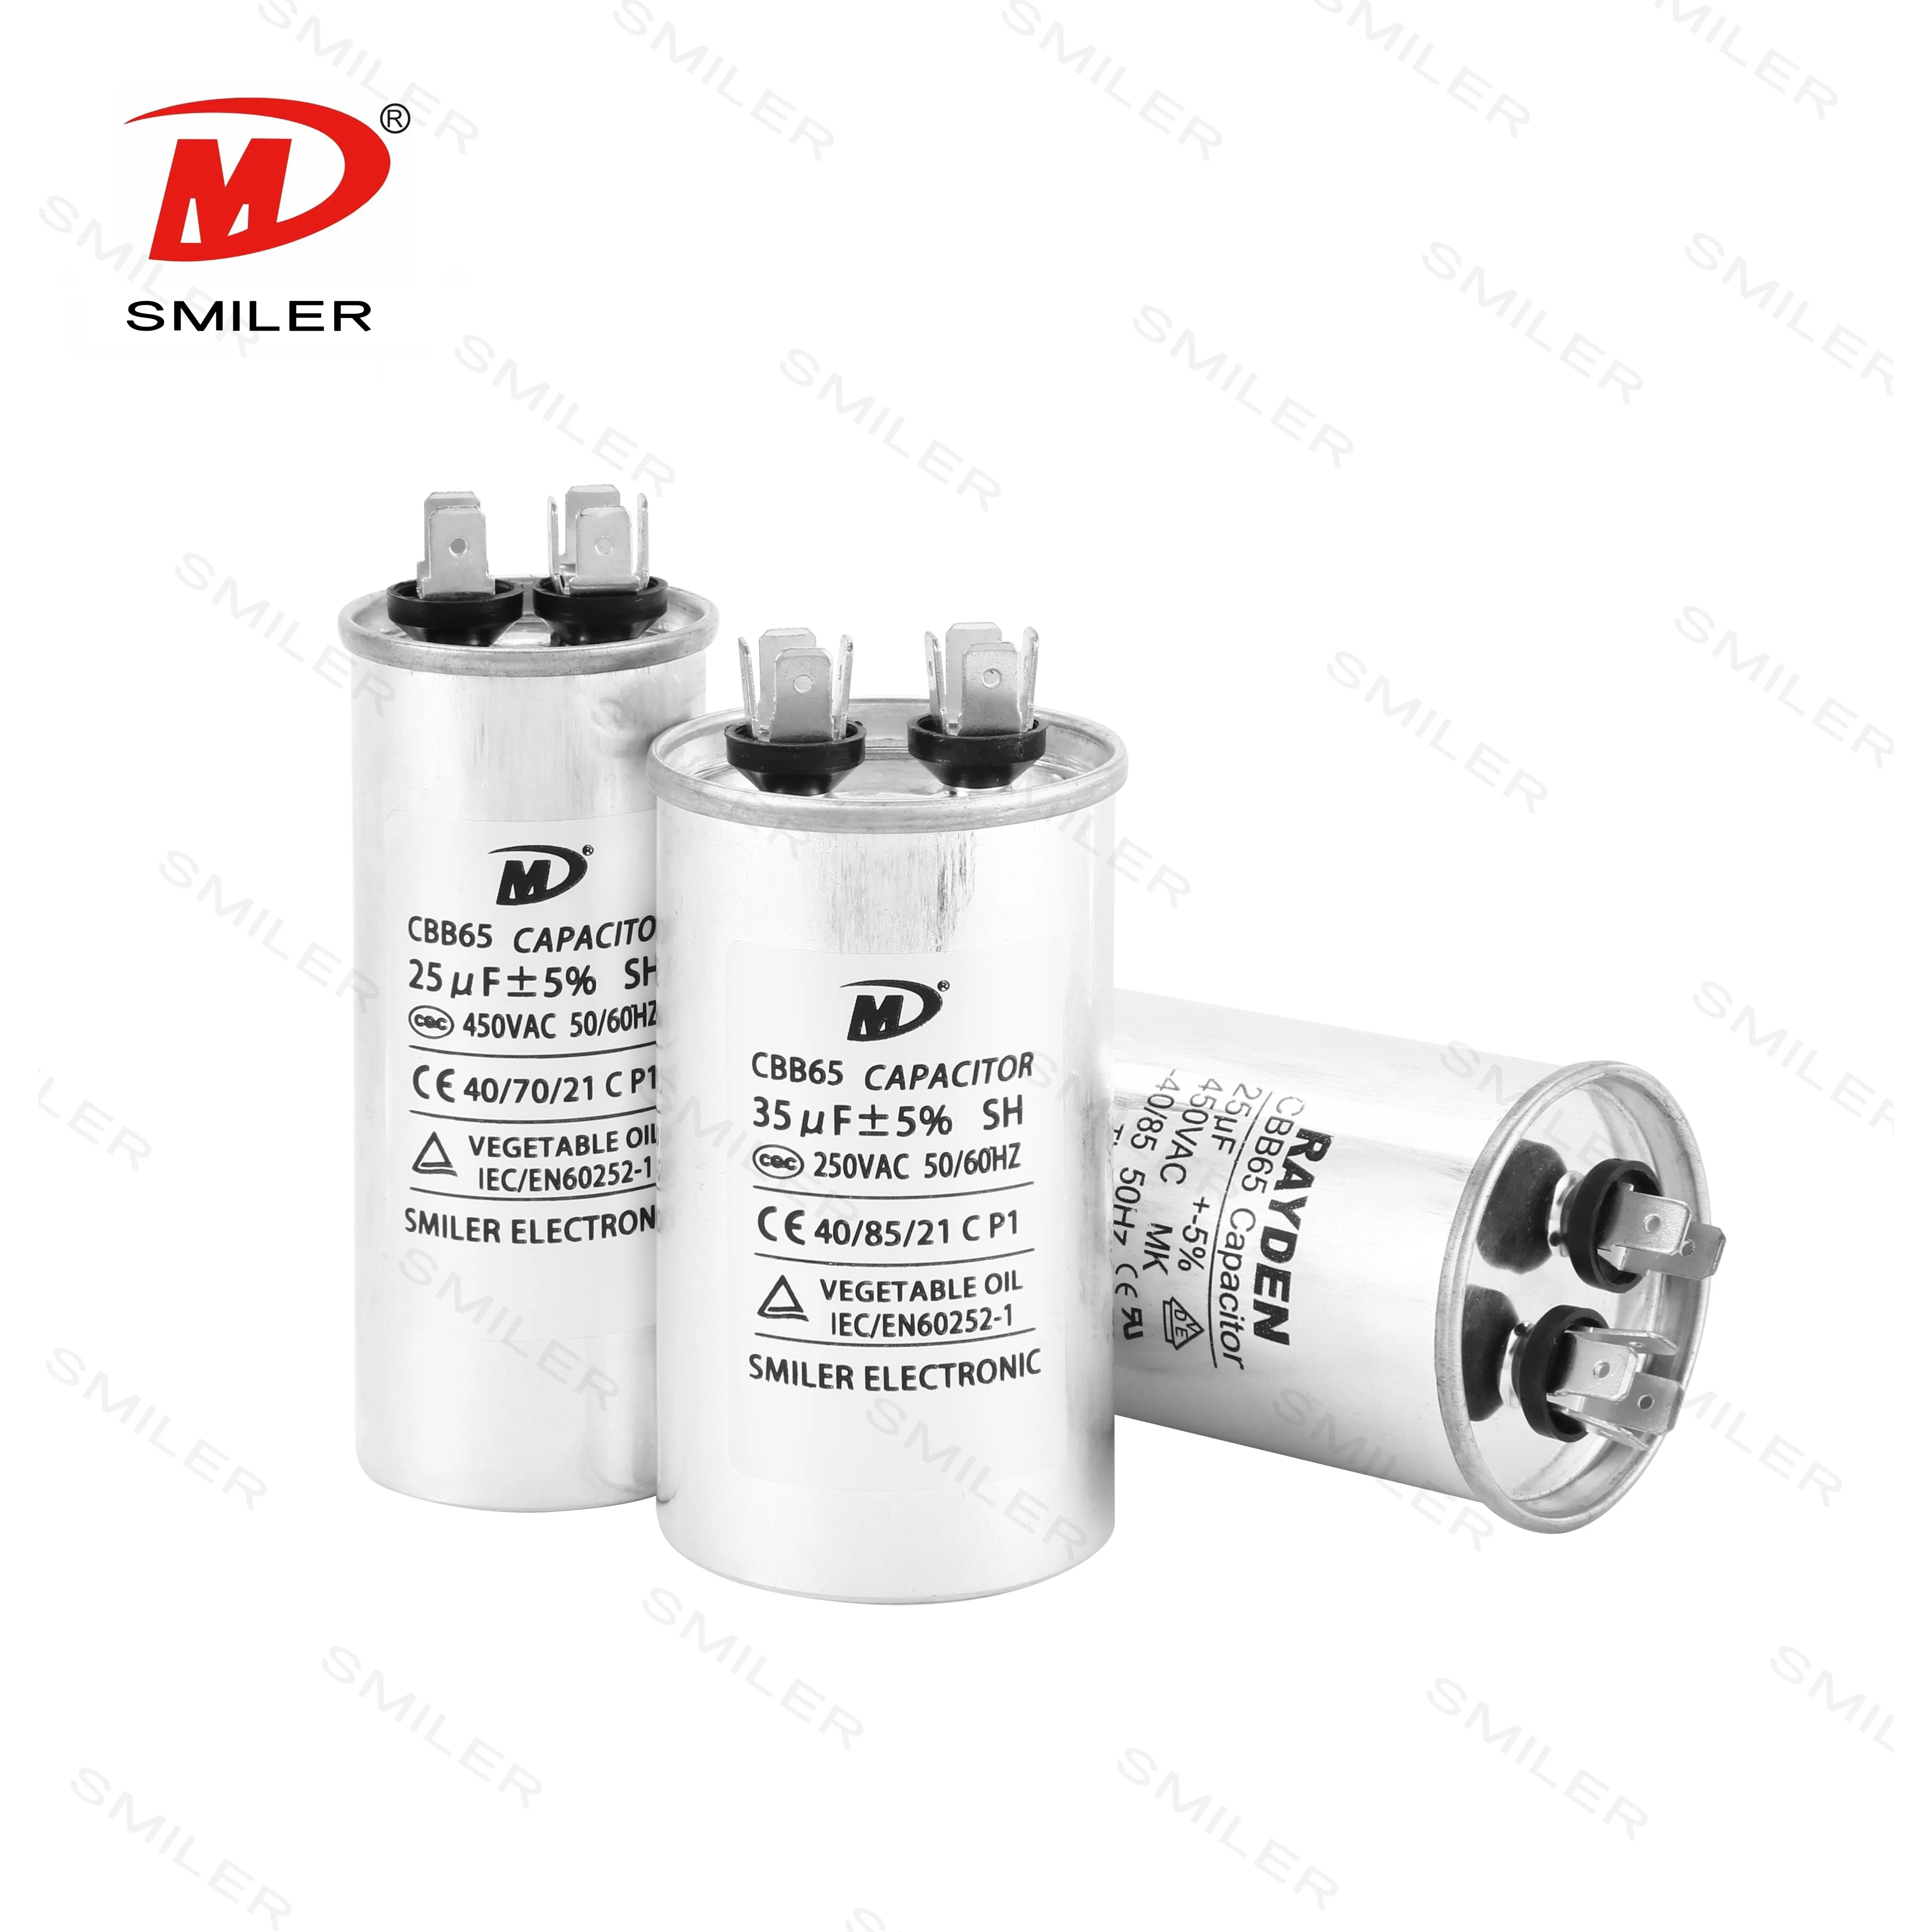
Sourcing the correct part is the most crucial step of an oil-filled motor run capacitor replacement. Always match the microfarad rating exactly. Ensure the voltage equals or exceeds the original. For maximum safety, professionals often choose our CBB65 series. These units feature a high-strength aluminum shell and a built-in explosion-proof device. They achieve a P2 safety class that effectively neutralizes rupture risks.
Start by verifying the power is off. Safely discharge the stored energy by bridging the terminals with an insulated screwdriver. Take a clear photograph of the existing wiring setup. Remove the mounting strap. Swap in the new explosion-proof motor capacitor. Reconnect the wires exactly as they were in the reference photo. Secure the unit tightly to prevent vibration damage.

Once the new part is securely installed, restore the power and turn on the system. Listen for a sharp and immediate motor startup without any hesitant humming. Using a clamp meter to measure the running amps can further verify that the motor is operating smoothly within its rated parameters.
Correct physical orientation extends component life. Whenever possible, mount the cylinder vertically with the terminals pointing upward. This minimizes the gravitational pull on the fluid seals. Avoid overtightening the mounting bracket because it can warp the casing. Never aggressively twist the terminal wires.
Incorporate visual inspections into routine seasonal HVAC maintenance. Keep the surrounding condenser coils clean and free of debris. Proper airflow ensures the entire system runs cooler. This significantly reduces the thermal stress placed on all electrical components inside the cabinet.
When evaluating a system upgrade, understanding the dry-type vs. oil-filled capacitor debate is highly beneficial. For applications like water pumps, fans, or shredders, upgrading to a resin-filled AC motor capacitor is an excellent preventative strategy. Products like the SMILER capacitor CBB60 and CBB61 Capacitor use internal resin potting instead of oil. They entirely eliminate the risk of fluid leaks while offering low internal temperature rise and a UL94 V-0 flame-retardant plastic shell.
A: Yes, fluid leakage indicates that the internal pressure has compromised the seal. This causes a drop in capacitance that can overheat or burn out the motor. The escaping dielectric oil can also pose a serious fire risk if exposed to sparks. It should be replaced immediately.
A: Absolutely. It is a highly recommended upgrade for certain motors. By understanding the advantages of the dry type vs. oil-filled capacitor comparison, buyers can choose solutions like the SMILER capacitor CBB60 series. They are filled with solid epoxy resin rather than liquid oil. They physically eliminate the possibility of fluid leaks while providing excellent flame resistance.
A: The most important preparation is ensuring total power disconnection. Use an insulated tool to discharge the old component. When selecting the new part, ensure the microfarad (µF) rating matches perfectly. The voltage should be equal to or higher than the original.
A: An explosion-proof design prevents the casing from violently rupturing during a failure. It does not make the component immune to severe electrical stress. If the motor fails shortly after replacement, there may be underlying issues. These include extreme voltage fluctuations, a failing motor winding, or improper installation.
A: Not all failing components will leak. If the motor hums but will not start, the compressor frequently trips the breaker. Or the top of the casing shows a visible outward bulge. The part is likely dead. The most accurate diagnostic method is testing the microfarad value with a digital multimeter.
Exploring How AC Capacitors and DC Capacitors Function Differently
Understanding Snubber Capacitor: RC vs. RCD Snubber Differences
Understanding DC Capacitance to Prevent Converter Oscillations
CBB65 250VAC Capacitor Explained: What Every Professional Should Know

AC Condenser Unit Repair: Best CBB65 Capacitor Guide 2026


 Add
Building 12,Huazhi Technology Innovation Center,28 Sanle East Road,Beijiao,Foshan,Guangdong,China
Add
Building 12,Huazhi Technology Innovation Center,28 Sanle East Road,Beijiao,Foshan,Guangdong,China
 Phone
+86 18007576965 / 0757-22391591
Phone
+86 18007576965 / 0757-22391591
 Email
ari@sml-cap.cn
Email
ari@sml-cap.cn


